How to Make a Delicious Milk Bar Pumpkin Pie Recipe from Scratch
There’s something magical about a perfectly made pumpkin pie. Its sweet, spiced filling paired with a crisp crust evokes warmth, nostalgia, and the cozy vibes of fall. But have you ever tried the Milk Bar Pumpkin Pie Recipe ? Known for its unique twist on traditional desserts, Milk Bar’s pumpkin pie is the perfect balance of creamy, flavorful, and just the right amount of spice. The good news is, you don’t need to book a flight to try this incredible pie – you can make it yourself at home with just a few simple steps.
In this guide, I’m going to walk you through how to make the famous Milk Bar Pumpkin Pie from scratch. Not only will you be able to recreate the flavors that have made this pie a favorite at Milk Bar locations, but you’ll also be able to add your personal touch. Get ready to impress your family and friends with a homemade pumpkin pie that is nothing short of extraordinary.
Table of Contents
What Makes Milk Bar Pumpkin Pie So Special?
Before we dive into the step-by-step instructions, let’s talk about what makes the Milk Bar Pumpkin Pie stand out from the rest. You might be familiar with the traditional pumpkin pie, but Milk Bar’s version is an elevated treat that combines the classic flavors with some modern flair.
Unique Flavor Profile
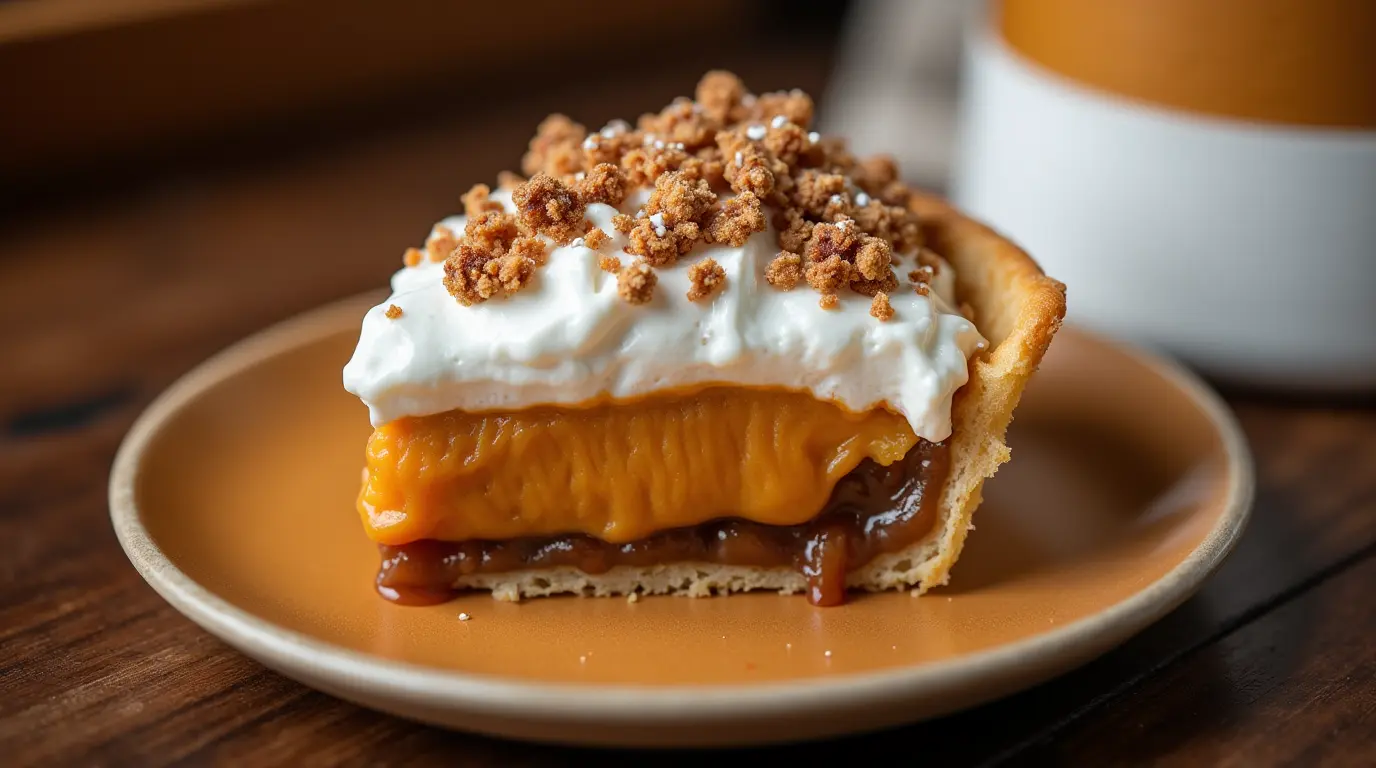
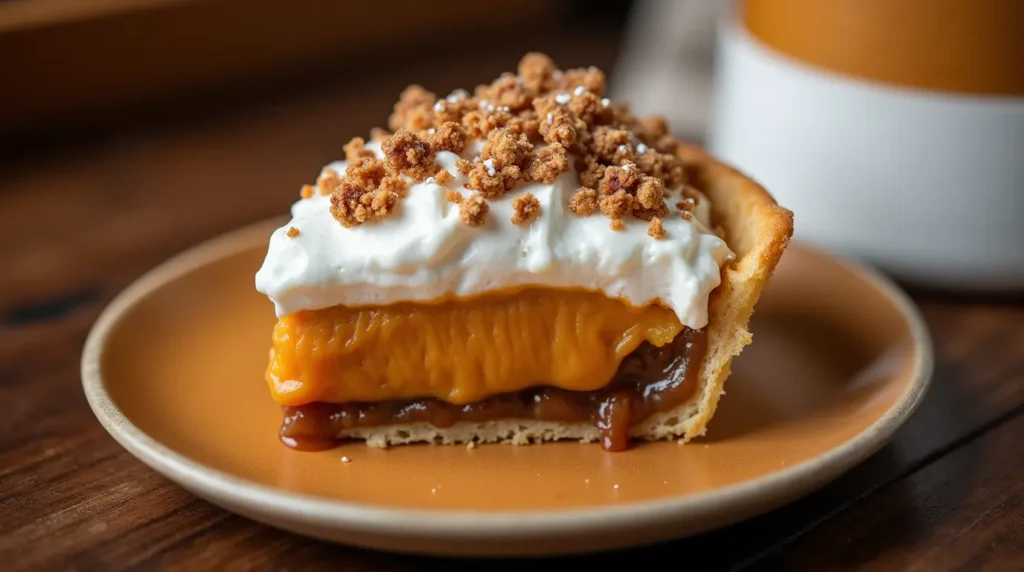
The Milk Bar Pumpkin Pie has a rich, creamy filling made from pure pumpkin puree, cinnamon, and nutmeg, just like traditional recipes. But where it really shines is in its texture and flavor balance. The filling is velvety and smooth, but it’s the addition of heavy cream and milk that gives it a richer, more indulgent taste. The spices are perfectly balanced to deliver that familiar autumn taste without overpowering the other flavors.
Milk Bar’s Signature Touch
Milk Bar is known for adding a personal twist to its desserts, making them more than just your average sweet treat. One of the standout elements of the Milk Bar Pumpkin Pie is its crust. Instead of the usual pastry crust, Milk Bar uses a Cornflake Crunch crust. This combination of crispy, caramelized cornflakes and butter provides a surprising texture contrast to the soft, creamy filling. It’s an unexpected but delightful change that makes this pumpkin pie something special.
Ingredients You’ll Need for the Milk Bar Pumpkin Pie Recipe
Before you get started, make sure you have all the ingredients on hand. The list might look a bit long, but each ingredient plays a vital role in making this pie come together perfectly. Here’s a breakdown of what you’ll need:
Ingredients for the Pumpkin Pie Filling:
- 2 cups of pumpkin puree – This is the base of your filling, giving it that signature pumpkin flavor.
- 3 large eggs – Used to bind the filling together and create a smooth, cohesive texture.
- 3/4 cup of brown sugar – The brown sugar adds a deep, caramel-like sweetness.
- 1 teaspoon of ground cinnamon – Cinnamon brings warmth and depth to the pie.
- 1/2 teaspoon of ground nutmeg – Adds a slightly sweet, spicy kick.
- 1 cup of heavy cream – Makes the filling rich and creamy.
- 1/2 cup of milk – Helps balance the richness of the heavy cream and smooths out the texture.
- 1/2 teaspoon of salt – Enhances the sweetness and spices, helping to bring out the flavors in the filling.
Ingredients for the Cookie Crust:
- 1 1/2 cups of Milk Bar Cornflake Crunch – The secret to this pie’s one-of-a-kind crust. This crunchy, sweet mixture replaces the usual pie crust and gives the pie a signature crunch.
- 1/4 cup of unsalted butter – To bind the Cornflake Crunch together and give it a rich flavor.
Step-by-Step Guide to Making Milk Bar Pumpkin Pie from Scratch
Now that you have all the ingredients, it’s time to get baking! Follow these easy steps to create a perfect Milk Bar Pumpkin Pie.
Step 1 – Prepare the Cookie Crust
The crust is a key element in the Milk Bar Pumpkin Pie, and the Cornflake Crunch is what makes it so special. Here’s how to make it:
Making the Cornflake Crunch:
- Ingredients:
- 1 1/2 cups of Cornflakes (crushed slightly)
- 1/4 cup of sugar
- 1 tablespoon of light corn syrup
- 1/4 cup of melted butter
- Instructions:
- Preheat your oven to 300°F (150°C).
- In a bowl, mix the Cornflakes with sugar.
- Drizzle the corn syrup and melted butter over the mixture, stirring until everything is evenly coated.
- Spread the mixture onto a baking sheet in an even layer.
- Bake for 15 minutes or until the Cornflakes are golden and crispy. Let it cool before using it as the base for your crust.
Assembling the Crust:
- Once the Cornflake Crunch has cooled, place it in your pie dish.
- Press it down firmly to create an even layer. The crunch should cover the bottom and sides of the dish.
- If necessary, use the back of a spoon to ensure the edges are compact and the crust is sturdy.
Step 2 – Prepare the Pumpkin Pie Filling
While the Cornflake Crunch is cooling, you can prepare the creamy pumpkin pie filling.
- In a large mixing bowl, whisk together the pumpkin puree, eggs, brown sugar, cinnamon, nutmeg, milk, and heavy cream.
- Continue to whisk until the mixture is smooth and all the ingredients are well incorporated. Be sure there are no lumps.
- Taste the mixture and adjust the spices if needed. If you prefer a more intense spice flavor, you can add a bit more cinnamon or nutmeg.
Step 3 – Bake the Pie
- Preheat your oven to 350°F (175°C).
- Pour the prepared pumpkin filling into the Cornflake Crunch crust.
- Smooth the top with a spatula, ensuring an even layer.
- Bake the pie for 55 to 60 minutes. The filling should set but still have a slight jiggle in the center.
- Once done, remove the pie from the oven and let it cool completely. The pie will continue to set as it cools.
Step 4 – Cooling and Serving
Let your Milk Bar Pumpkin Pie cool to room temperature. For the best texture, it’s recommended to refrigerate the pie for at least 3 hours before serving, but you can also let it sit overnight. This helps the flavors meld and ensures a firmer filling.
When ready to serve, slice the pie and enjoy! You can top it with freshly whipped cream or a dusting of cinnamon for extra flair.
Tips for Perfecting Your Milk Bar Pumpkin Pie
While the recipe is simple, there are a few tips to make sure your pie turns out perfectly every time.
Perfecting the Cookie Crust
- Adjust the Crunch: Depending on your preference, you can make the Cornflake Crunch thicker or thinner. If you love a crunchy crust, use a bit more Cornflakes. For a lighter crust, reduce the amount slightly.
- Avoid Overbaking: Make sure to bake the Cornflake Crunch just enough to get it golden and crispy, but not too long that it burns. Keep an eye on it to avoid any burnt edges.
Flavor Variations
- Add Chocolate: For a unique twist, try adding a layer of melted chocolate to the crust before adding the pumpkin filling. This pairs beautifully with the spiced filling.
- Caramelize the Pumpkin: If you want an extra layer of flavor, you can caramelize the pumpkin puree before mixing it with the other ingredients. Just cook it on medium heat until it’s slightly browned and thickened.
Making It Ahead of Time
This pie actually tastes better the day after it’s baked, so feel free to make it ahead of time. Store it in the fridge, and it will stay fresh for 3-4 days. You can even freeze the pie if you want to prepare it weeks in advance.
Common Mistakes to Avoid When Making Milk Bar Pumpkin Pie
While this pie is fairly straightforward to make, there are a few mistakes you’ll want to avoid:
Overmixing the Filling
When preparing the filling, don’t overmix. Whisking too vigorously can introduce air into the mixture and affect the texture. Gently mix until smooth to ensure a creamy filling.
Underbaking the Pie
The filling should have a slight jiggle when you remove it from the oven. If it still looks runny, give it a few extra minutes of baking. Trust your instincts, and always use the jiggle test to check if it’s set.
Uneven Crust
For a sturdy, even crust, make sure the Cornflake Crunch is packed tightly into the pie dish. Press it evenly along the bottom and up the sides to create a stable base that won’t crumble when you slice into the pie.
FAQ – Your Milk Bar Pumpkin Pie Questions Answered
Q1: Can I use a different crust for the Milk Bar Pumpkin Pie?
Yes, you can substitute with a graham cracker crust or a traditional pie crust. However, the Cornflake Crunch gives it that signature Milk Bar twist, so if you’re aiming for authenticity, I recommend sticking with the original.
Q2: How do I know when the pie is done baking?
The center of the pie should be slightly jiggly but set. If it still looks runny, give it more time in the oven. You can also insert a knife into the filling; if it comes out clean, it’s done.
Q3: Can I freeze the Milk Bar Pumpkin Pie?
Absolutely! The pie freezes well. Make sure to wrap it tightly in plastic wrap and store it in the freezer for up to 1 month. To serve, let it thaw in the fridge overnight.
Q4: How long does this pumpkin pie stay fresh?
When stored properly in the fridge, your Milk Bar Pumpkin Pie should stay fresh for 3-4 days.
Conclusion: Enjoy Your Homemade Milk Bar Pumpkin Pie!
Making a Milk Bar Pumpkin Pie from scratch might take a little time, but the end result is worth every bit of effort. Whether you’re baking it for Thanksgiving, a special gathering, or simply for your own enjoyment, this pie is sure to impress. The combination of the creamy filling and crispy Cornflake Crunch crust will have your guests asking for seconds.
Now that you have the recipe, it’s time to get baking! I’d love to hear how your Milk Bar Pumpkin Pie turns out. Feel free to share your photos or leave a comment below with your thoughts on this recipe.
