How to Make Perfect Zebra Cakes: A Step-by-Step Guide
The Magic of Zebra Cakes
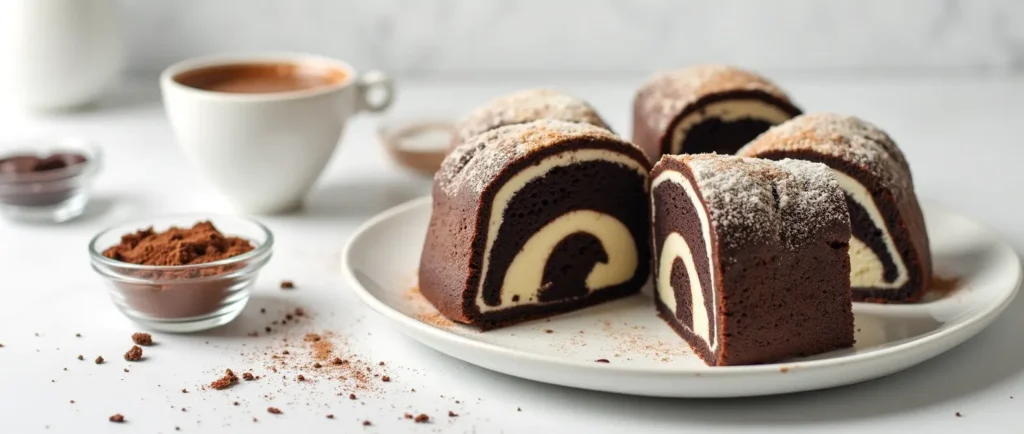
Imagine this: you slice into a cake, and its cross-section reveals elegant, alternating black-and-white stripes. It’s a visual and culinary masterpiece that’s both striking and delicious. Zebra cakes, with their hypnotic patterns and delectable taste, are sure to steal the show at any gathering. The best part? You don’t need to be a professional baker to achieve this stunning effect. In this guide, you’ll learn how to make perfect zebra cakes that are as delightful to eat as they are to look at.
Table of Contents
Ingredients for Zebra Cakes
Before diving into the recipe, gather all the necessary ingredients. Having everything prepared ahead of time ensures a smooth and enjoyable baking experience.
For the Cake Batter
| Ingredient | Quantity |
|---|---|
| All-purpose flour | 3 cups |
| Sugar | 2 cups |
| Baking powder | 2 teaspoons |
| Baking soda | 1 teaspoon |
| Salt | 1/2 teaspoon |
| Eggs | 4 large |
| Milk | 1 cup |
| Vegetable oil | 1 cup |
| Vanilla extract | 1 teaspoon |
| Cocoa powder | 3 tablespoons |
For the Frosting
| Ingredient | Quantity |
| Butter | 1/2 cup |
| Powdered sugar | 2 cups |
| Milk | 2 tablespoons |
| Vanilla extract | 1 teaspoon |
Step-by-Step Instructions to Make Zebra Cakes
Baking a zebra cake is not just about the end result; it’s about the process. Follow these steps to create a dessert that’s as fun to make as it is to serve.
Step 1: Prepare Your Baking Pan
Start by setting the stage for your masterpiece. Preheat your oven to 350°F (175°C). Grease a round 9-inch baking pan and line it with parchment paper. This step ensures your cake won’t stick to the pan, making it easy to remove later.
Step 2: Mix the Cake Batter
- Combine dry ingredients:
- In a large mixing bowl, whisk together the flour, sugar, baking powder, baking soda, and salt.
- Add wet ingredients:
- Crack the eggs into the bowl, then pour in the milk, vegetable oil, and vanilla extract. Mix everything until the batter is smooth and lump-free.
Step 3: Divide and Color the Batter
- Split the batter evenly into two separate bowls:
- Leave one bowl of batter plain.
- To the second bowl, add the cocoa powder and mix until fully incorporated. The contrast between these two batters creates the signature zebra pattern.
Step 4: Create the Zebra Pattern
Here’s where the magic happens:
- Using a ladle or large spoon, pour 2 tablespoons of plain batter into the center of your prepared pan.
- On top of the plain batter, pour 2 tablespoons of chocolate batter.
- Repeat this process, alternating between the two batters. The layers will spread naturally, forming concentric rings that resemble zebra stripes.
Step 5: Bake the Cake
- Place the pan in the preheated oven and bake for 35-40 minutes.
- Test for doneness by inserting a toothpick into the center. If it comes out clean, your cake is ready.
Step 6: Cool and Frost
- Allow the cake to cool completely before removing it from the pan.
- If desired, frost the cake with buttercream or ganache. You can also serve it plain to let the stripes shine.
Pro Tips for the Perfect Zebra Cake
Achieving the ideal zebra cake takes a bit of finesse. Here are some tips to ensure your success:
- Use room-temperature ingredients. This helps the batter mix more evenly.
- Don’t rush the layering process. Pouring the batters carefully ensures clean, distinct stripes.
- Tap the pan gently on the counter before baking to remove air bubbles that can disrupt the pattern.
- Experiment with different flavorings. For example, add almond extract to the plain batter for a nutty twist.
Frequently Asked Questions (FAQ) About Zebra Cakes
To help you master the art of zebra cakes, here are answers to common questions:
Can I make zebra cakes without cocoa powder?
Yes! You can replace cocoa powder with dark food coloring or even instant coffee for a unique flavor and color variation.
Why did my zebra stripes blend together?
This often happens when the batter is too runny. Make sure your batter has a thick but pourable consistency to maintain distinct layers.
How do I store zebra cakes?
Store your zebra cake in an airtight container at room temperature for up to 3 days. For longer storage, refrigerate it for up to a week.
Can I use whole wheat flour instead of all-purpose flour?
Yes, but the texture may be denser. You might need to adjust the amount of liquid to compensate for the flour’s higher absorption.
Conclusion
Making a zebra cake is a rewarding experience that combines creativity and culinary skill. With its eye-catching design and irresistible flavor, this dessert is guaranteed to be a hit at any event. Now that you know how to create this striped masterpiece, it’s time to gather your ingredients and start baking. Whether you’re celebrating a special occasion or simply indulging your sweet tooth, your zebra cake will be a showstopper. Happy baking!
