How to Make Lavash Bread recipe at Home: Step-by-Step Guide
Experience the Joy of Homemade Lavash Bread
There’s something special about baking your own bread, especially when it’s a traditional recipe like lavash. The process of transforming simple ingredients into something delicious is not only rewarding but connects you to centuries of culinary tradition. As the dough rises and the scent of freshly baked lavash Bread recipe fills your kitchen, you’ll feel the satisfaction of creating something from scratch that’s both comforting and versatile. Whether you’re a novice baker or an experienced cook, learning how to make lavash bread at home is an exciting journey.
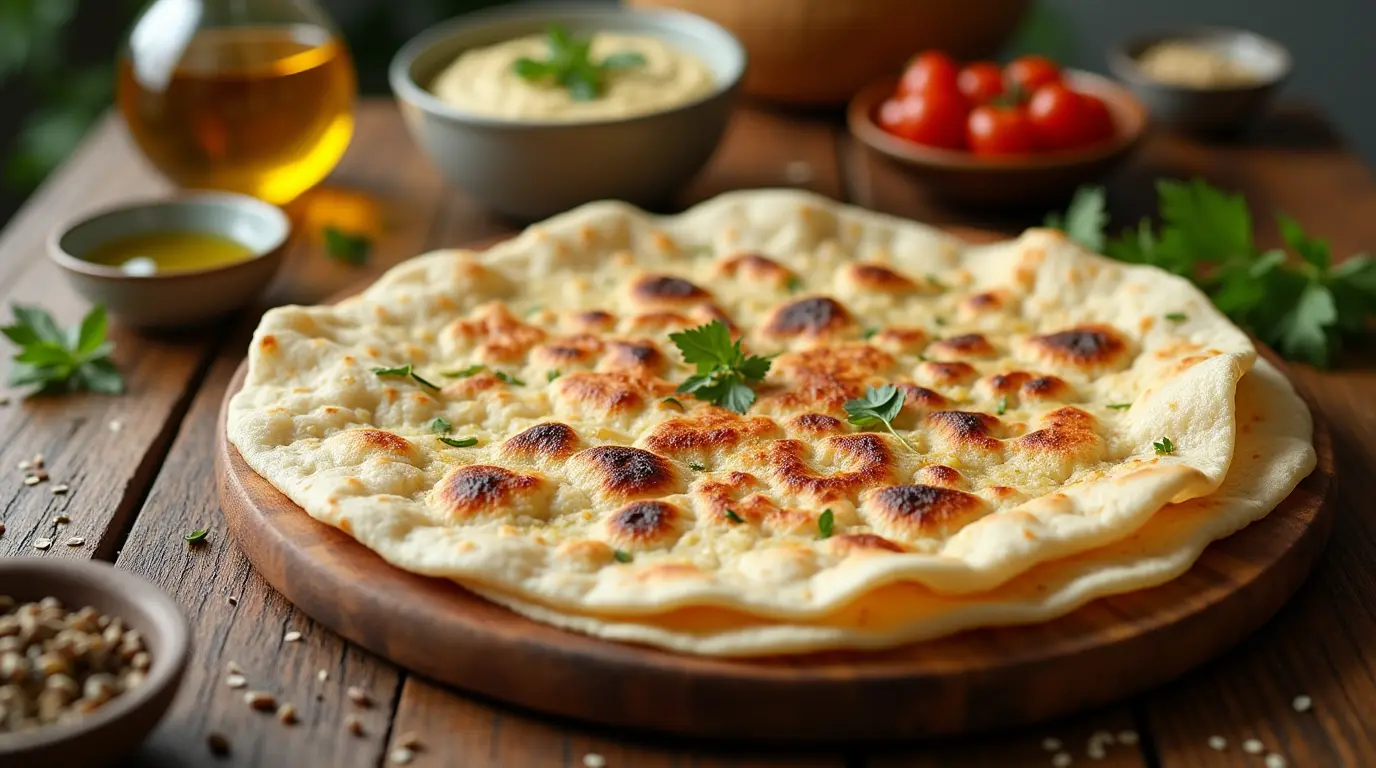
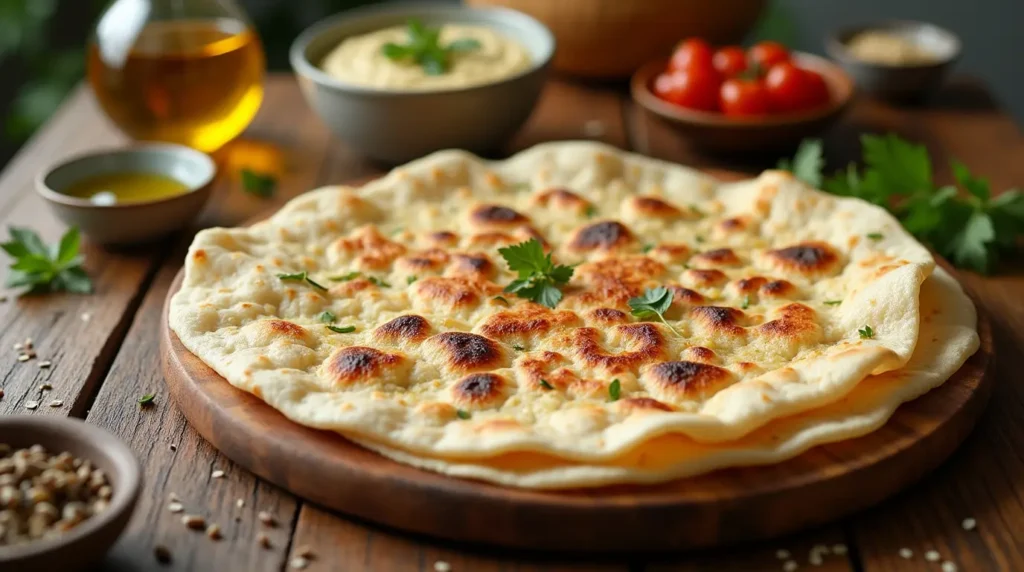
Lavash is a soft, thin flatbread that has been a staple in the Middle East, Caucasus, and Central Asia for centuries. Known for its light and chewy texture with a crisp edge, it is often used as a wrap for meats, vegetables, or dips. Making lavash from home means you can enjoy it fresh and free of preservatives, and with this step-by-step guide, you’ll be able to master the art of baking lavash bread.
Table of Contents
What is Lavash Bread? An Introduction to this Traditional Flatbread
Lavash is more than just a flatbread; it’s a cultural experience. This traditional bread has been baked for generations across the Middle East, Caucasus, and Central Asia, and it has earned recognition from UNESCO as an Intangible Cultural Heritage of Humanity. Lavash is a key part of many celebrations, daily meals, and rituals in these regions, making it an integral part of their culinary legacy.
So, what makes lavash bread so special?
- Texture: When baked properly, lavash is soft and pliable, with a delicate crispiness along the edges.
- Taste: The flavor is subtle, allowing it to pair perfectly with a variety of dishes. It’s neither too sweet nor too savory, making it incredibly versatile.
- Uses: Lavash can be used in wraps, as a side to stews and soups, or served with dips like hummus and baba ghanoush.
Making lavash bread at home not only gives you the freshest version of this timeless bread but also lets you experience the same sense of community and tradition that generations before you have enjoyed. Baking it yourself means you can customize it to your taste and serve it as an accompaniment to your favorite meals.
Essential Ingredients for Lavash Bread
Before you begin, you’ll need to gather your ingredients. Lavash bread is incredibly simple to make, and you likely already have most of these ingredients in your kitchen.
| Ingredient | Measurement |
|---|---|
| All-purpose flour | 2 ½ cups |
| Warm water | 1 cup |
| Active dry yeast | 1 tsp |
| Salt | 1 tsp |
| Sugar | 1 tsp |
| Olive oil (optional) | 1 tbsp |
Why These Ingredients?
- Flour: All-purpose flour is the best choice for lavash, giving it the soft, stretchy consistency it’s known for.
- Water: Warm water activates the yeast, helping the dough rise and become airy.
- Yeast: Active dry yeast is essential for leavening the dough, making it rise.
- Salt: Adds flavor and balances out the sweetness of the sugar.
- Sugar: Helps activate the yeast and enhances the flavor.
- Olive Oil: While optional, olive oil can be added to give the dough a soft texture and subtle flavor.
These ingredients work together to create a soft, flavorful dough that’s perfect for making lavash bread. You can also experiment with different types of flour, such as whole wheat, to add variety to your bread.
Step-by-Step Instructions: How to Make Lavash Bread at Home
1. Prepare the Yeast Mixture
Start by preparing the yeast mixture, as this will be the foundation of your dough.
- In a small bowl, dissolve 1 teaspoon of sugar in 1 cup of warm water (about 100°F or 37°C).
- Sprinkle 1 teaspoon of active dry yeast over the water and stir gently to combine.
- Let the mixture sit for 5-10 minutes. You should see the yeast begin to bubble and foam, indicating that it’s active and ready to go.
2. Make the Dough
In a large mixing bowl, combine the flour and salt.
- Add the yeast mixture to the flour and stir until the dough starts to come together.
- Turn the dough onto a lightly floured surface and knead for about 8-10 minutes. The goal is to achieve a smooth, elastic dough. If the dough is too sticky, sprinkle a little more flour on your hands or the work surface.
3. Let the Dough Rise
Once the dough is smooth and elastic, place it in a lightly oiled bowl.
- Cover the bowl with a damp cloth or plastic wrap and let it rise for 1-2 hours, or until it doubles in size.
- This step is crucial for achieving the right texture in your lavash. The dough should feel soft and slightly springy after rising.
4. Shape the Lavash
After the dough has risen, punch it down to release any air bubbles.
- Divide the dough into 4-6 equal portions, depending on how large you want your lavash to be.
- Roll each portion into a smooth ball and let them rest for 10-15 minutes to relax the gluten.
- Once rested, roll each piece into a thin, round disc, about 10-12 inches in diameter. Aim for an even thickness throughout.
5. Bake the Lavash
Now it’s time to bake your lavash.
- Preheat your oven to 475°F (245°C). Place a baking sheet or pizza stone in the oven to heat up.
- Place one of the lavash discs onto the hot baking sheet or stone and bake for 3-5 minutes, or until the lavash puffs up and turns golden brown with crispy edges.
- Keep an eye on it, as lavash can bake very quickly. You want the bread to have slight puffiness and golden spots.
6. Cool and Serve
Remove the lavash from the oven and let it cool slightly on a wire rack.
- Lavash is best enjoyed warm, but you can also store it in an airtight container for up to 2-3 days or freeze it for later use.
Tips for Perfect Lavash Bread
While making lavash bread at home is fairly simple, there are a few tricks to ensure that your bread turns out perfect every time:
- Dough Consistency: The dough should feel soft but not too sticky. If it’s too sticky, add a little more flour, but be careful not to overdo it. The dough should be pliable.
- Rolling Thin: For that signature lavash texture, it’s important to roll the dough as thin as possible. If you find the dough shrinking back as you roll, let it rest for a few minutes before continuing.
- Baking Hot: Preheat your oven and baking sheet to get that crispy texture on the outside. A hot oven ensures the lavash cooks quickly, keeping it soft inside and crispy on the edges.
- Storing Lavash: If you have leftovers, store them in a sealed plastic bag or container at room temperature for up to 3 days. To freeze, wrap the lavash in plastic wrap or foil and store in an airtight container for up to 3 months.
Creative Ways to Enjoy Your Homemade Lavash Bread
Once you’ve mastered the art of making lavash, you’ll find plenty of ways to enjoy it. Here are a few ideas to inspire your next meal:
- Wraps and Rolls: Use lavash as a wrap for grilled meats, roasted vegetables, or a fresh salad. It’s the perfect vehicle for sandwiches and wraps.
- Lavash Chips: Cut leftover lavash into triangles, brush with olive oil, sprinkle with salt or spices, and bake until crispy for a homemade snack.
- Serve with Dips: Lavash is the perfect accompaniment to dips like hummus, baba ghanoush, or tzatziki. Tear off a piece of lavash and dip away.
- Lavash Pizza: For a quick pizza option, spread tomato sauce on lavash, top with your favorite toppings, and bake for a few minutes. It’s a fast and tasty alternative to traditional pizza crust.
Troubleshooting Common Issues When Making Lavash Bread
Even the best bakers sometimes face challenges in the kitchen. Here are a few common issues you might encounter and how to fix them:
- Dough Not Rising: If your dough isn’t rising, make sure the water is warm (not hot) and that your yeast is still active. If it doesn’t foam, your yeast might be expired.
- Lavash Too Thick: If your lavash ends up too thick, try rolling the dough thinner next time. It’s crucial to roll the dough as thin as possible for the characteristic lavash texture.
- Lavash Too Hard: If your lavash turns out too hard, you may have overbaked it. Keep a close eye on the baking time and remove it from the oven as soon as it’s golden and puffed.
Conclusion: Enjoy the Benefits of Homemade Lavash Bread
Making lavash bread at home is not just about baking bread; it’s about connecting with a centuries-old tradition and creating something wholesome and delicious from scratch. By following this step-by-step guide, you’ll be able to enjoy warm, freshly baked lavash that’s perfect for wraps, dips, and more. The best part? You can customize it to suit your tastes and dietary preferences.
So why wait? Roll up your sleeves, gather your ingredients, and start baking. The simple pleasure of homemade lavash bread is just a few steps away, and it’s a culinary experience you won’t forget.
FAQ: Frequently Asked Questions About Lavash Bread Recipe
Can I use whole wheat flour for lavash bread?
Yes! You can substitute whole wheat flour for all-purpose flour to create a healthier version of lavash. Keep in mind that it may alter the texture slightly, but the flavor will be richer.
Can I make lavash bread without yeast?
Traditional lavash bread requires yeast for leavening, but you can try a no-yeast version by using baking powder. The result will be slightly different in texture but still delicious.
How do I store lavash bread?
Lavash bread can be stored in an airtight container for up to 2-3 days at room temperature. If you have leftovers, you can freeze it for up to 3 months by wrapping it tightly in plastic wrap or foil.
Can I use lavash bread for wraps?
Absolutely! Lavash is perfect for wraps due to its thin, flexible texture. It’s a great option for sandwiches, wraps, and even burritos.
Ready to bake? Give this lavash bread recipe a try today! Enjoy the simple pleasure of homemade bread and share it with your loved ones. Happy baking!
