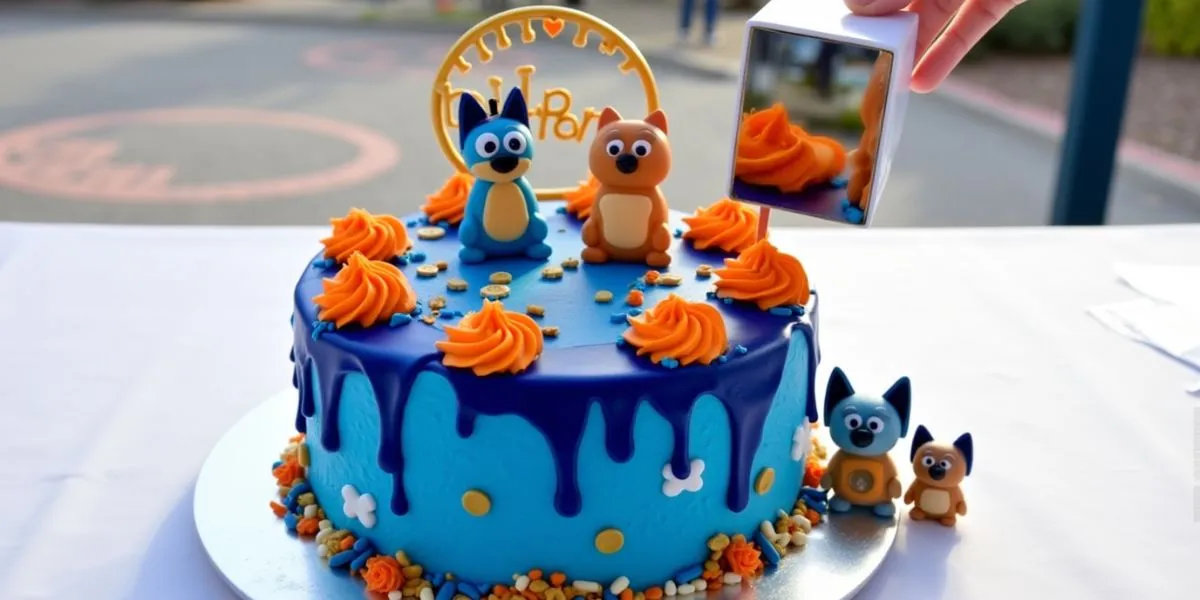
How to Make the Perfect Bluey Cake: A Step-by-Step Guide
Creating the perfect Bluey cake isn’t just about baking; it’s about crafting a centerpiece that will make your celebration unforgettable. Whether it’s for a child’s birthday or a fun family project, this guide will provide you with all the steps and tips you need to create a stunning Bluey cake. Even if you’re new to baking, this guide will walk you through the process with ease.
Table of Contents
Introduction: Why a Bluey Cake Is the Perfect Choice
Bluey has captured hearts around the globe with its charm, humor, and relatable family stories. Imagine the joy on your little one’s face when they see a cake modeled after their favorite character. A Bluey cake isn’t just a dessert; it’s a way to bring extra magic to your celebration. In this guide, you’ll learn how to bake, decorate, and assemble a cake that’s as delightful as Bluey herself.

Ingredients and Tools Needed for Your Bluey Cake
Ingredients for the Bluey Cake Base
To create the perfect Bluey cake base, you’ll need these essential ingredients:
| Ingredient | Quantity | Notes |
|---|---|---|
| All-purpose flour | 2 1/2 cups | Sifted for a fluffier cake |
| Sugar | 2 cups | Granulated |
| Unsalted butter | 1 cup | Softened |
| Eggs | 4 large | Room temperature |
| Baking powder | 2 teaspoons | |
| Milk | 1 cup | Whole milk preferred |
| Vanilla extract | 2 teaspoons | Pure vanilla for best flavor |
Ingredients for Frosting and Decorations
| Ingredient | Quantity | Purpose |
| Buttercream frosting | 4 cups | For covering and decorating |
| Blue food coloring | As needed | To achieve Bluey’s signature hue |
| Black fondant | Small amount | For facial details |
| White fondant | Small amount | For eyes and accents |
| Edible marker | 1 | To draw fine details |
Tools You’ll Need
- Round cake pans (8-inch recommended)
- Offset spatula
- Piping bags and tips
- Rolling pin (for fondant)
- Cake turntable (optional but helpful)
Step 1: Baking the Cake Layers
Preparing the Batter
- Preheat your oven to 350°F (175°C) and grease your cake pans.
- In a large bowl, cream together the butter and sugar until light and fluffy.
- Add the eggs one at a time, mixing thoroughly after each addition.
- Stir in the vanilla extract for a rich flavor base.
- In a separate bowl, combine the flour and baking powder. Gradually add this mixture to the wet ingredients, alternating with the milk. Start and end with the dry ingredients for best results.
- Pour the batter evenly into the prepared cake pans.
Baking Tips
- Place the pans on the middle rack for even baking.
- Use an oven thermometer to ensure your oven is at the correct temperature.
- Tap the pans lightly on the counter to release air bubbles.
Bake for 25-30 minutes, or until a toothpick inserted in the center comes out clean. Allow the cakes to cool completely before moving on to decorating.
Step 2: Preparing the Frosting and Decorations
Coloring the Frosting
- Divide the buttercream into separate bowls.
- Add blue food coloring to one bowl, blending until you achieve Bluey’s characteristic shade. Leave some frosting white for accents.
- Mix thoroughly to ensure a smooth, even color.
Working with Fondant
- Roll out black fondant to create Bluey’s nose, mouth, and eyes.
- Use white fondant for additional details like Bluey’s eyes and facial accents.
- Use an edible marker to add fine details for a polished look.
Step 3: Assembling the Bluey Cake
Layering and Crumb Coating
- Place one cake layer on your cake board or serving plate.
- Spread a layer of blue frosting evenly across the top, then add the second cake layer.
- Apply a thin crumb coat to seal in loose crumbs and smooth the surface. Chill the cake for 15-20 minutes to set the crumb coat.
Final Frosting and Decorating
- Spread a final layer of blue frosting around the entire cake, smoothing it with an offset spatula for a clean finish.
- Carefully place the fondant pieces to form Bluey’s face, ensuring accurate placement of the eyes, nose, and other features.
- Use piping bags to add accents, such as Bluey’s ears and distinctive markings.
Frequently Asked Questions (FAQ)
Q1: Can I make a Bluey cake without fondant?
Absolutely! You can use colored frosting and piping techniques to replicate Bluey’s features. This method is ideal for those who prefer to avoid fondant.
Q2: How far in advance can I make the Bluey cake?
You can bake the cake layers up to two days in advance. Store them in an airtight container at room temperature. Decorating is best done on the day of the event to ensure freshness.
Q3: What if I’m not skilled at decorating?
Start simple! Focus on Bluey’s signature blue color and add a basic face design. Even minimal effort can create an impressive result.
Conclusion: Celebrate with Your Stunning Bluey Cake
Congratulations—you’ve created a Bluey cake that’s sure to be the star of any celebration! Not only is it visually stunning, but it’s also a delicious treat that everyone will enjoy. Don’t forget to take pictures of your masterpiece and share the joy with friends and family. Ready to start baking? Gather your ingredients and let’s bring Bluey to life!